Cómo instalar un bloqueador de anuncios en Android - Blokada
Blokada es una aplicación móvil gratuita y de código abierto que utiliza servidores DNS para bloquear anuncios y rastreadores en tu dispositivo con el objetivo de mejorar tu privacidad. Con esta guía aprenderás a instalar Blokada en tu dispositivo Android.
Blokada es un bloqueador de anuncios que actúa como una VPN para bloquear el tráfico no deseado con base en hostnames (urls). Esto evita que las aplicaciones ejecutándose en tu dispositivo carguen anuncios y datos maliciosos.
Instalación
Para instalar Blokada, visita su página en la Play Store y haz clic en Instalar (Fig. 1).

Setup
After Blokada is installed, you can open it by clicking on the icon or clicking on Open in the Play Store (Fig. 2).

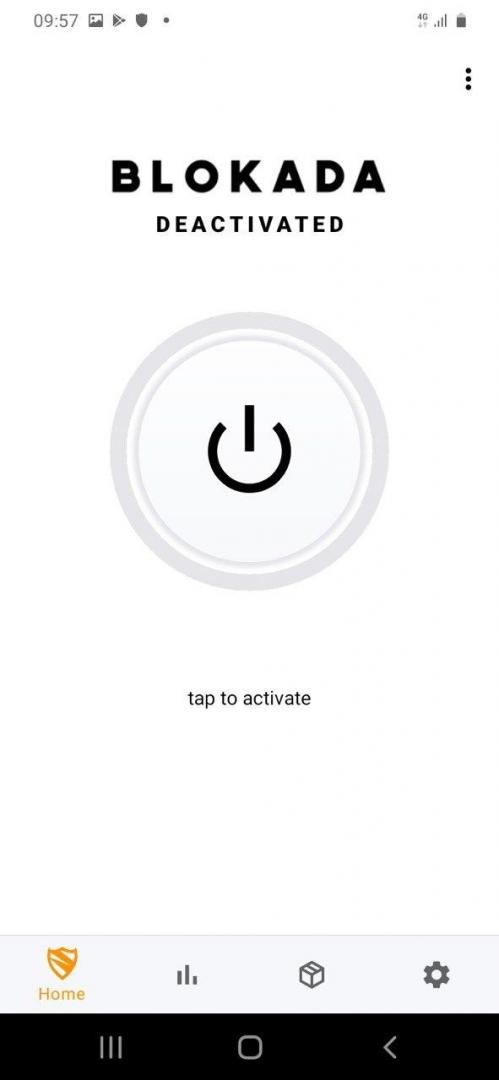
By default, Blokada is disabled. To enable it, click the large button (Fig. 3).
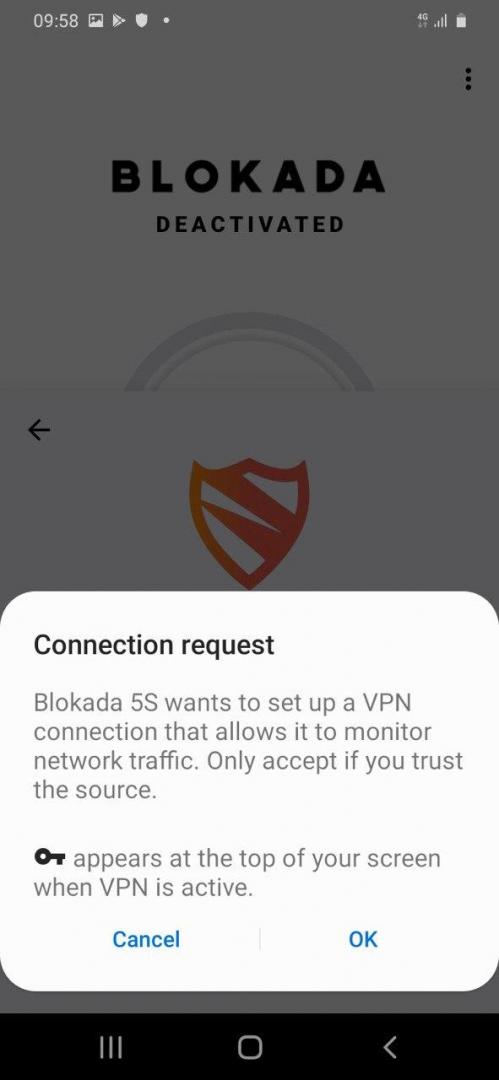
You'll be asked to allow Blokada to setup a VPN, which is necessary to block ads. Blokada says it sets up a split-VPN, which only routes traffic on port 53, used to communicate with external DNS resolvers. What this means is that any traffic (e.g.: you trying to open privacyinternational.org in your browser) will be routed through Blokada and checked against a local DNS hostfile. If the hostname is in the list (for example an adserver), the resource won't be loaded. This prevent ads and malicious trackers and ads from being reached and displayed.
As such, Blokada claims it does not monitor or filter your regular network traffic. Since it's open source and the code is publicly visible, this claim can be regularly verified.
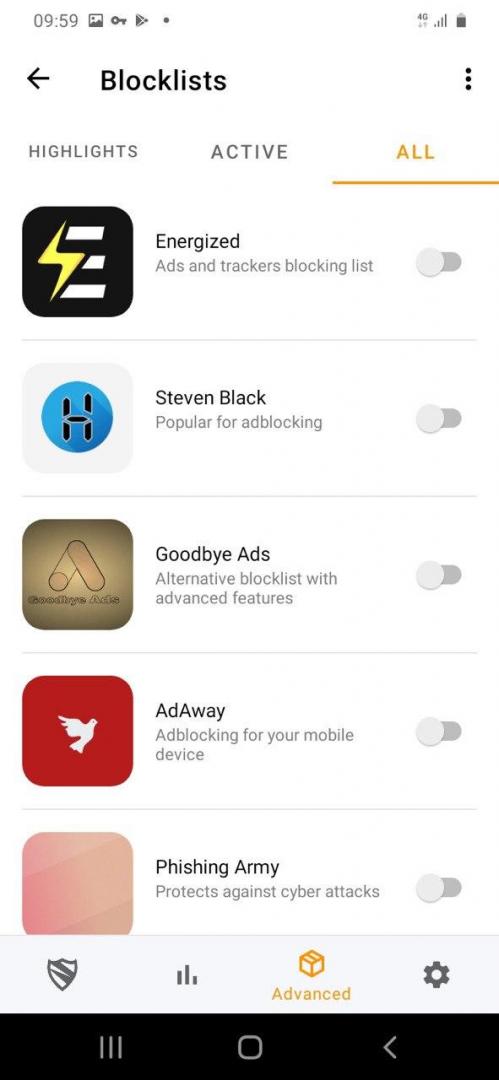
Blokada should be enabled now. To select a blocking list, click on the Advanced tab (Fig. 5), and then select one (or more) from the list. You might want to use the same list we suggest in our DNS guides, Steven Black hosts list, as it is often updated (the first item, Energized, was last updated on 2018).
After selecting the blocking list, your device should start blocking ads immediately. To learn more about Blokada and its advanced features, visit its official website.
Found a mistake? An outdated screenshot? Think this could be improved? Check out our Github repository and contribute to help keep these guides up-to-date and useful!